A Poor Man's MooseFS Pro: Vertical Scaling with Ceph RBD

MooseFS community edition is great, but you don't get the high availability feature of having multiple master nodes that MooseFSPro enables.
As a cheaper alternative, I'll be setting up Ceph RBD with Proxmox and using that to give my single master node some basic fail over.
If you want to learn more about MooseFS you can also checkout my comparison with RAID.
My MooseFS and Proxmox Clusters
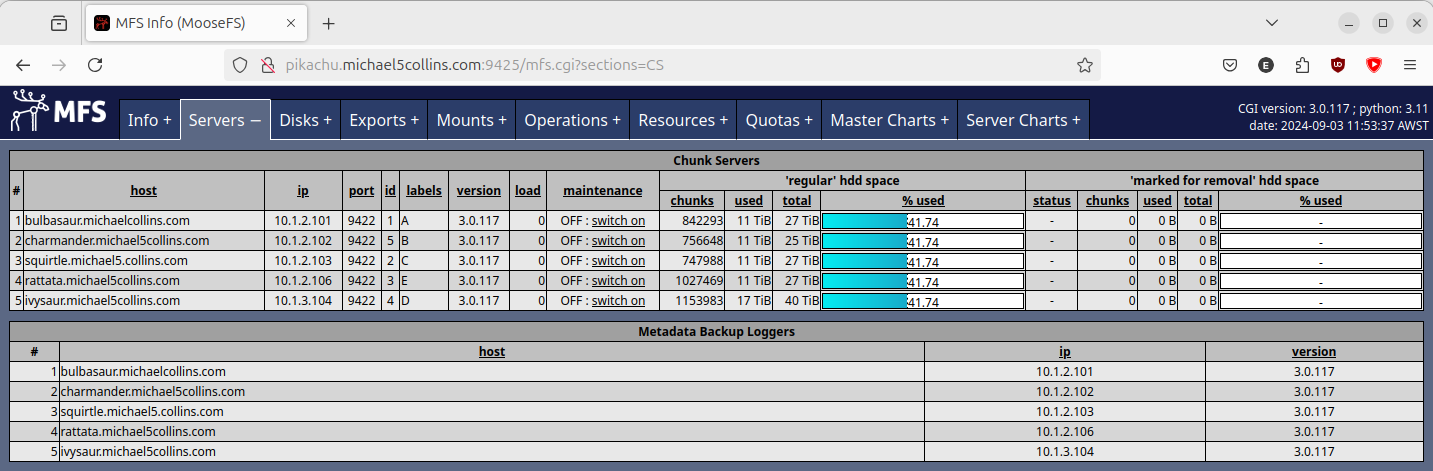
I have a 5x node MooseFS cluster compromised of 4x low power arm64 machines and a Proxmox VM with physical disk passthrough for the chunkservers. With a seperate Proxmox VM called 'pikachu' for the MooseFS master. (My host naming scheme is gen 1 Pokemon btw.)
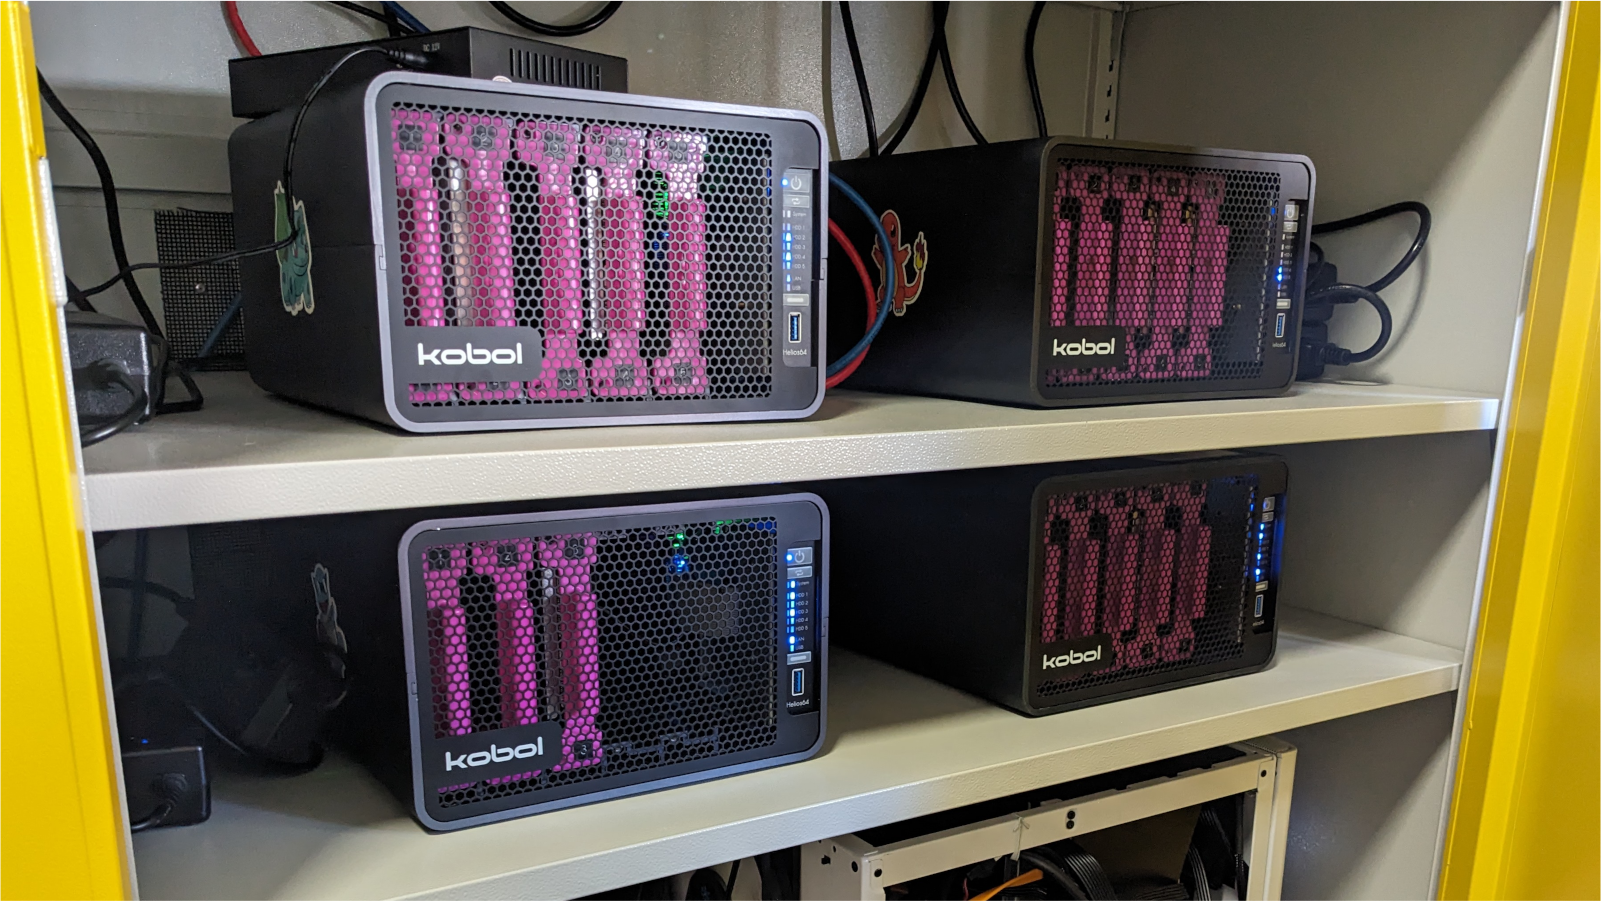
I have a 4x node Proxmox cluster, that is compromised of 2x microATX machines and a Chatreey NUC. Each has 64GB of non-ECC RAM and a ~6 core AMD 3000/4000 series processor with integrated graphics.
Installing Ceph
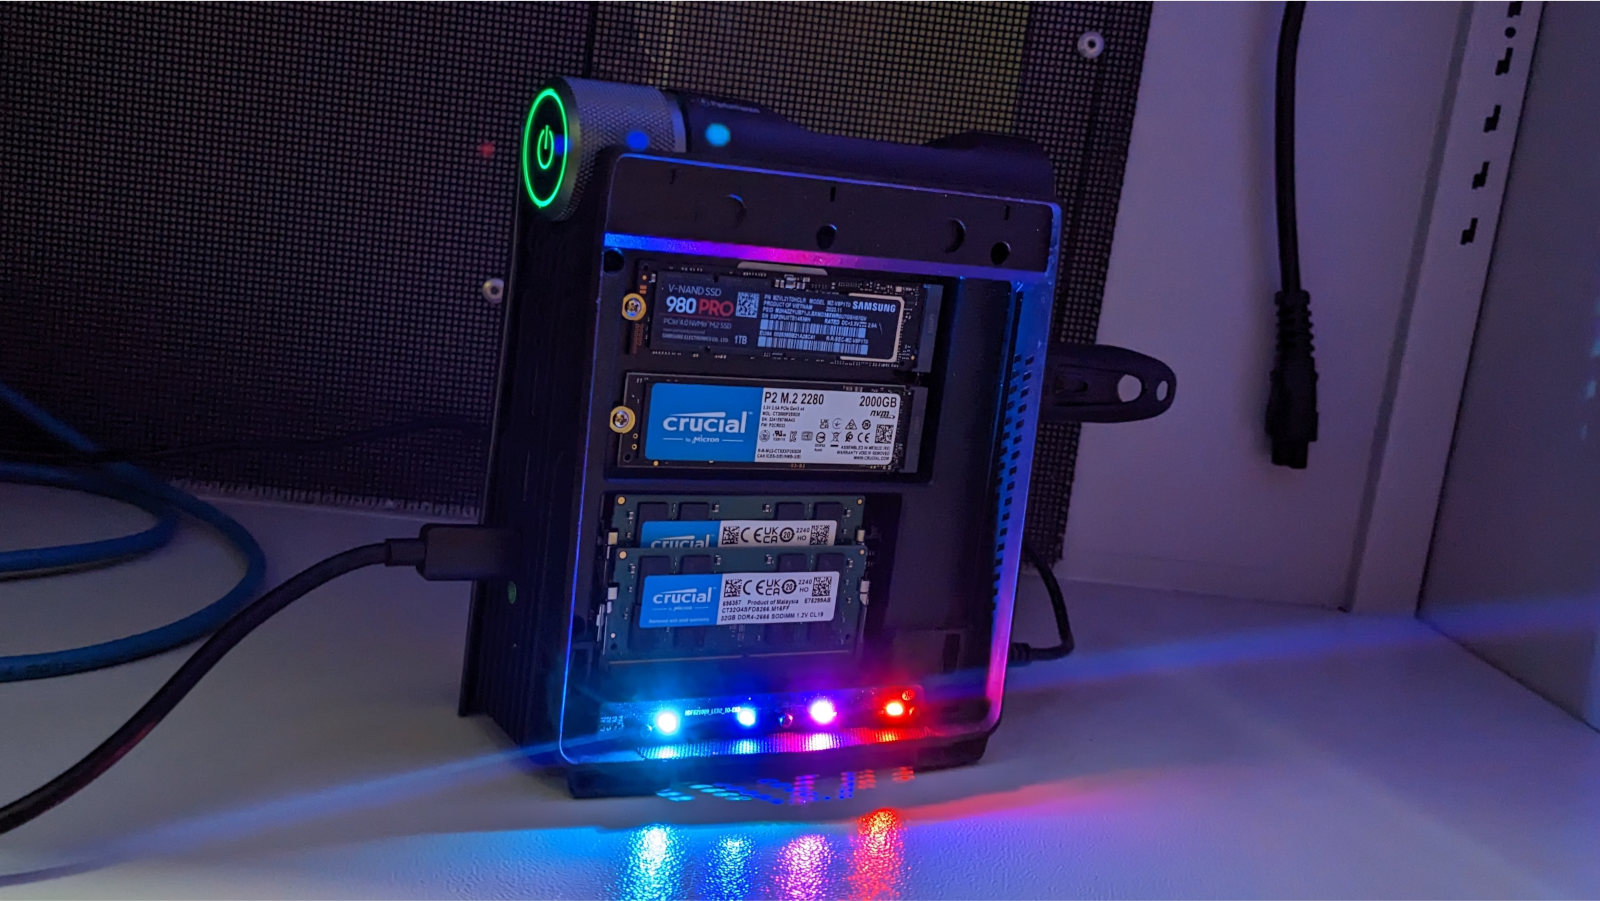
To start I'll have to setup Ceph RBD with the 3x 1TB Samsung Red NVMe drives I have in my Proxmox hosts. These drives are terrible for Ceph and shouldn't be used, but this is ultimately a poor man's guide. So we'll be using them anyway! :)

On all 3x Proxmox hosts, install the community edition of Ceph:
1pcadmin@jigglypuff:~$ sudo nano /etc/apt/sources.list.d/ceph.list
2pcadmin@jigglypuff:~$ sudo cat /etc/apt/sources.list.d/ceph.list
3deb http://download.proxmox.com/debian/ceph-reef bookworm no-subscription
4pcadmin@jigglypuff:~$ sudo apt update && sudo apt upgrade -y
Then we just follow the Proxmox guide:
https://pve.proxmox.com/wiki/Deploy_Hyper-Converged_Ceph_Cluster
Install Ceph reef edition without an enterprise subscription on all 3x nodes:
1pcadmin@eevee:~$ sudo pveceph install --repository no-subscription --version reef
2...
3After this operation, 176 MB of additional disk space will be used.
4Do you want to continue? [Y/n] y
Bootstrapping Ceph
Initialise a cluster:
1pcadmin@eevee:~$ sudo pveceph init --network 10.1.1.0/16 --min_size 2 --size 3
2pcadmin@eevee:~$
We run into our first error:
1pcadmin@eevee:~$ sudo pveceph mon create
2Could not connect to ceph cluster despite configured monitors
Had to cleanup an old config to get further (I had installed Ceph RBD here previously with Proxmox):
 1pcadmin@eevee:~$ sudo systemctl stop ceph-mon@eevee
 2pcadmin@eevee:~$ sudo systemctl stop ceph.target
 3pcadmin@eevee:~$ sudo rm -rf /etc/ceph/*; \
 4sudo rm -rf /var/lib/ceph/mon/*; \
 5sudo rm -rf /var/log/ceph/*; \
 6sudo rm -f /etc/pve/ceph.conf; \
 7sudo rm -f /etc/pve/priv/ceph*
 8
 9pcadmin@eevee:~$ sudo pveceph init --network 10.1.1.0/16 --min_size 2 --size 3
10pcadmin@eevee:~$ sudo pveceph mon create
11unable to get monitor info from DNS SRV with service name: ceph-mon
12rados_connect failed - No such file or directory
13monmaptool: monmap file /tmp/monmap
14monmaptool: generated fsid ...
15...
16monmaptool: writing epoch 0 to /tmp/monmap (1 monitors)
17Job for ceph-mon@eevee.service failed because the control process exited with error code.
18See "systemctl status ceph-mon@eevee.service" and "journalctl -xeu ceph-mon@eevee.service" for details.
19command '/bin/systemctl start ceph-mon@eevee' failed: exit code 1
I then had to undo the reset-failed counter to get the first monitor up:
1pcadmin@eevee:~$ sudo systemctl reset-failed ceph-mon@eevee.service
2pcadmin@eevee:~$ sudo systemctl start ceph-mon@eevee.service
3pcadmin@eevee:~$ sudo journalctl -xeu ceph-mon@eevee.service
4...
5Sep 01 11:56:42 eevee systemd[1]: Started ceph-mon@eevee.service - Ceph cluster monitor daemon.
6░░ Subject: A start job for unit ceph-mon@eevee.service has finished successfully
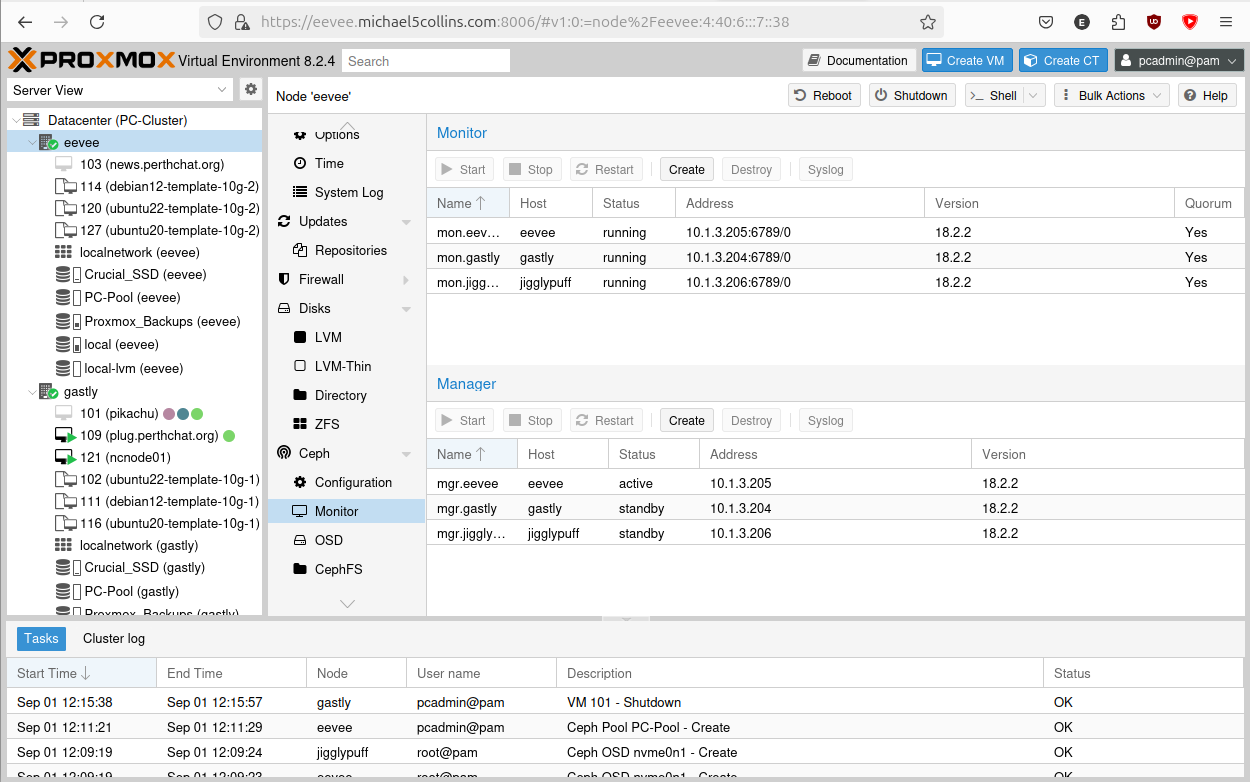
Setup Monitors and Managers
Nice, our first monitor is up! Now to make a monitor on all 3x hosts:
1pcadmin@jigglypuff:~$ sudo pveceph mon create
2...
3pcadmin@gastly:~$ sudo pveceph mon create
4...
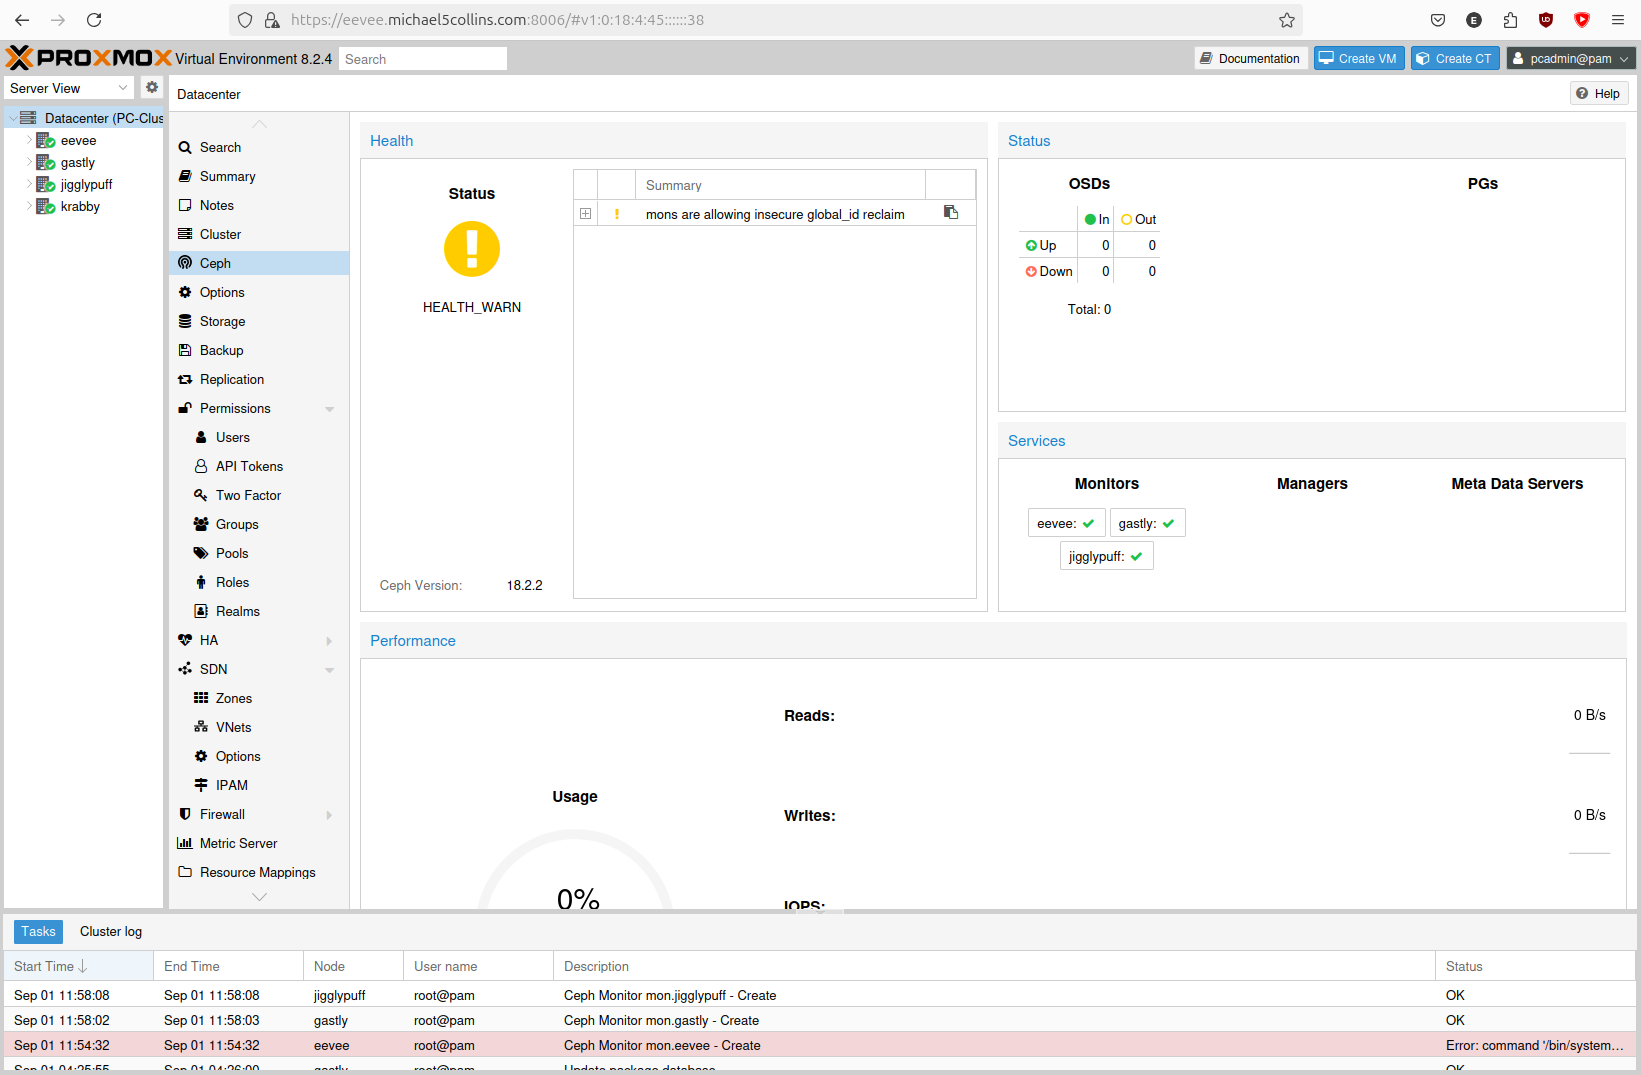
We now see the Ceph section in the Proxmox GUI is alive and giving us a status now.
I set up managers on all 3x hosts:
1pcadmin@workstation:~$ clush -bg proxmox sudo pveceph mgr create
2...
3starting service 'ceph-mgr@eevee.service'
4...
5starting service 'ceph-mgr@gastly.service'
6...
7starting service 'ceph-mgr@jigglypuff.service'
Adding the OSDs
Dig up the UUIDs of the NVMe's we want to use for RBD:
 1pcadmin@workstation:~$ clush -bg proxmox sudo lsblk
 2---------------
 3eevee
 4---------------
 5/dev/nvme0n1: UUID="5d8a8237-783e-4a18-896d-c88c74e5ecd9" BLOCK_SIZE="4096" TYPE="ext4"
 6...
 7---------------
 8gastly
 9---------------
10/dev/nvme0n1: UUID="ffd544b7-7ed6-4214-ac05-26449070b116" BLOCK_SIZE="4096" TYPE="ext4"
11...
12---------------
13jigglypuff
14---------------
15/dev/nvme0n1: UUID="a20f6fa3-617b-40bf-ae77-57c9e9f819b2" BLOCK_SIZE="4096" TYPE="ext4"
Finally we can zap then add all our NVMe drives (zaping is important to do if the devices were used previously in another Ceph cluster):
 1pcadmin@workstation:~$ clush -bg proxmox sudo ceph-volume lvm zap /dev/nvme0n1 --destroy
 2krabby: pcadmin@10.1.3.203: Permission denied (publickey).
 3eevee: --> Zapping: /dev/nvme0n1
 4eevee: Running command: /usr/bin/dd if=/dev/zero of=/dev/nvme0n1 bs=1M count=10 conv=fsync
 5eevee:  stderr: 10+0 records in
 6eevee: 10+0 records out
 7eevee:  stderr: 10485760 bytes (10 MB, 10 MiB) copied, 0.0194067 s, 540 MB/s
 8eevee: --> Zapping successful for: <Raw Device: /dev/nvme0n1>
 9...
10jigglypuff: --> Zapping successful for: <Raw Device: /dev/nvme0n1>
11...
12gastly: --> Zapping successful for: <Raw Device: /dev/nvme0n1>

We're left with a very basic 3 node RBD cluster.
Configuring the Proxmox Storage Pool
Configure the 'Pool' in Proxmox.

Configure the Proxmox HA Rule
Configure the 'HA' failover in Proxmox.
In the overarching Datacentre tab > HA > Groups > Create

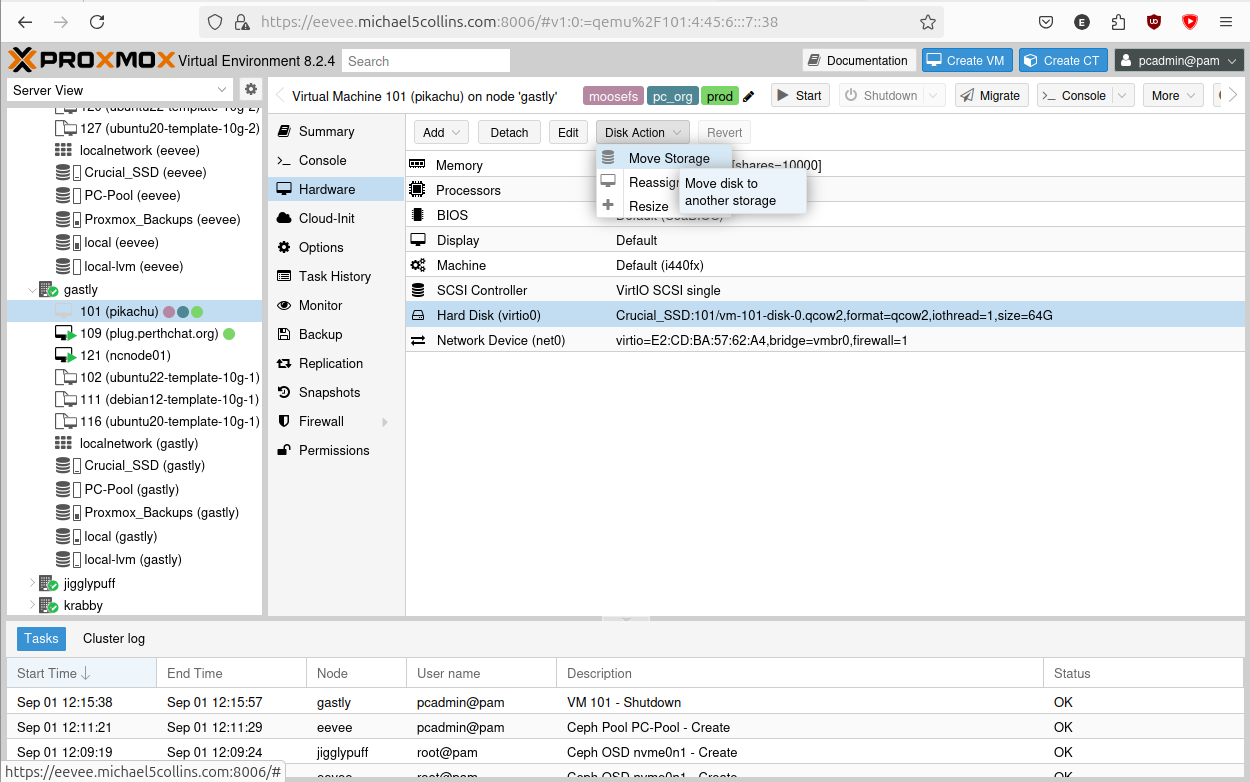
Copy the MooseFS Masters Disk to Ceph RBD
We can now move our MooseFS master VM to Ceph RBD.
First power down the VM.
Then select the VM > Hardware > Disk Action > Move Storage. Then just follow the prompts to migrate it to our new storage Pool.
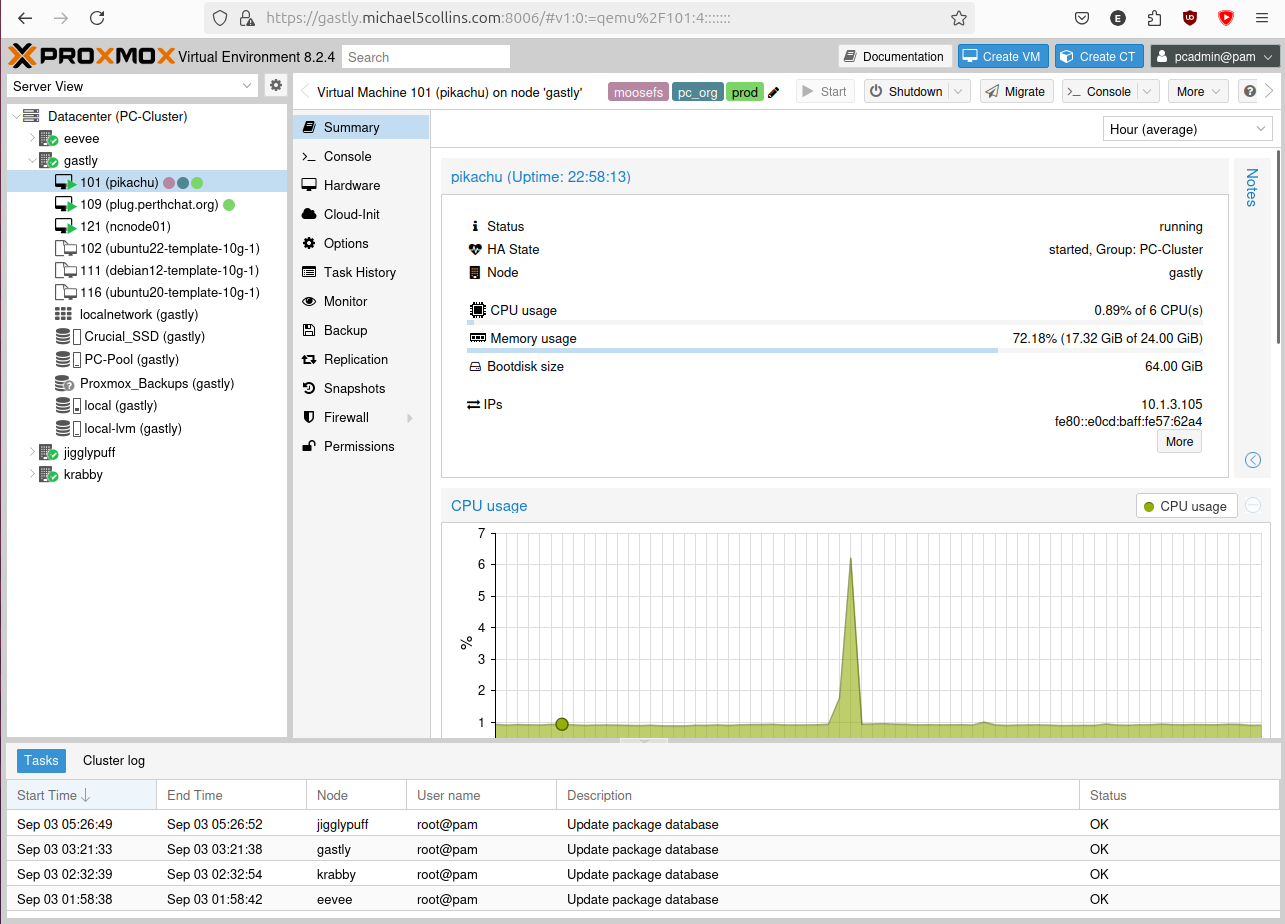
Add VM to HA Group
Finally, we then add the VM in question to our new HA group, letting it start up the VM again.
In the overarching Datacentre tab, select 'HA', in the 'Resources' row click 'Add'.

Finished!
There we go, a cheaper solution to adding some high availability to MooseFS community edition then buying the Pro version.
Please note: that for a production setup, this is not advisable! You would be much better off buying Moose Pro. MooseFS masters aren't meant to run in hypervised environments, it slows them down. Also using vertical scaling as a solution here is more hazardous.
You have been warned! :)